Welcome to our new Skyland! Article rewrites are welcome. If you see any missing images, please feel free to add them. Please use the Aboutfile template when uploading and add categories.
We are also aware of some articles being unavailable. Please bear with us while we are working to get them fixed.
Wow Pow: Difference between revisions
Frostelus3 (talk | contribs) m Minor grammars and spelling fixes Tag: visualeditor |
Frostelus3 (talk | contribs) Merged all notes with Trivia, added images and minor spelling and grammar fixes Tag: visualeditor |
||
| Line 1: | Line 1: | ||
[[File:Fireslam.png|thumb|Series 2 Spyro performing his Wow Pow, Fireslam]] | |||
'''Wow Pow''' is an additional upgrade power that are given to returning, fan-favorite [[Skylanders]] in the ''[[Skylanders (series)|Skylanders]]'' series. | '''Wow Pow''' is an additional upgrade power that are given to returning, fan-favorite [[Skylanders]] in the ''[[Skylanders (series)|Skylanders]]'' series. | ||
| Line 7: | Line 8: | ||
In ''Giants'', the Skylanders were only acknowledged as "Series 2", whereas in ''Swap Force'' and ''Trap Team'', every revised Skylanders released for these games received additional names for them. | In ''Giants'', the Skylanders were only acknowledged as "Series 2", whereas in ''Swap Force'' and ''Trap Team'', every revised Skylanders released for these games received additional names for them. | ||
==List of Wow Pow== | ==List of Wow Pow== | ||
{| class="article-table" | {| class="article-table" | ||
|+[[Skylanders: Giants|''Skylanders: Giants'']] | |+[[Skylanders: Giants|''Skylanders: Giants'']] | ||
!Skylander | ! colspan="2" |Skylander | ||
!Consoles | ! colspan="2" |Consoles | ||
!3DS | !3DS | ||
|- | |- | ||
|[[File:Spyro S2 Icon.png|frameless|100x100px]] | |||
|[[Spyro]] (Series 2) | |[[Spyro]] (Series 2) | ||
|[[File:Spyrowowpowpower.png|frameless]] | |||
|'''Fireslam!''' | |'''Fireslam!''' | ||
While flying, press Attack 2 to allow Spyro to shoot fireballs and perform a flaming slam. | While flying, press Attack 2 to allow Spyro to shoot fireballs and perform a flaming slam. | ||
| Line 27: | Line 25: | ||
Fireballs (Y) that are launched in the air are automatically powered up. | Fireballs (Y) that are launched in the air are automatically powered up. | ||
|- | |- | ||
|[[File:Wrecking Ball S2 Icon.png|frameless|100x100px]] | |||
|[[Wrecking Ball]] (Series 2) | |[[Wrecking Ball]] (Series 2) | ||
|[[File:Wrecking Ballwowpowpower.png|frameless]] | |||
|'''Disco Ball!''' | |'''Disco Ball!''' | ||
Press Attack 2 to turn Wrecking Ball's Force Field into a magical disco ball. | Press Attack 2 to turn Wrecking Ball's Force Field into a magical disco ball. | ||
|''To be added'' | |''To be added'' | ||
|- | |- | ||
|[[File:Double Trouble S2 Icon.png|frameless|100x100px]][[File:Royal Double Trouble Icon.png|frameless|100x100px]] | |||
|[[Double Trouble]] (Series 2) | |[[Double Trouble]] (Series 2) | ||
[[Royal Double Trouble]] (Series 2) | [[Royal Double Trouble]] (Series 2) | ||
|[[File:Double Troublewowpowpower.png|frameless]] | |||
|'''Triple Trouble!''' | |'''Triple Trouble!''' | ||
Eldritch Beam splits off into three separate beams when it locks on an enemy. | Eldritch Beam splits off into three separate beams when it locks on an enemy. | ||
|'''Triple Threat''' | |'''Triple Threat''' | ||
Lightning Staff (Y) now casts three electric bolts that spin | Lightning Staff (Y) now casts three electric bolts that spin around Double Drouble. | ||
|- | |- | ||
|[[File:Ignitor S2 Icon.png|frameless|100x100px]][[File:Legendary Ignitor Icon.png|frameless|100x100px]] | |||
|[[Ignitor]] (Series 2) | |[[Ignitor]] (Series 2) | ||
[[Legendary Ignitor]] (Series 2) | [[Legendary Ignitor]] (Series 2) | ||
|[[File:Ignitorwowpowpower.png|frameless]] | |||
|'''Blue Flame!''' | |'''Blue Flame!''' | ||
After executing Flame Form or Mega Slam attacks, Ignitor leaves a trail of blue fire. | After executing Flame Form or Mega Slam attacks, Ignitor leaves a trail of blue fire. | ||
| Line 46: | Line 54: | ||
Fire Spirit (X) now leaves behind flaming traps that damage enemies. | Fire Spirit (X) now leaves behind flaming traps that damage enemies. | ||
|- | |- | ||
|[[File:Eruptor S2 Icon.png|frameless|100x100px]] | |||
|[[Eruptor]] (Series 2) | |[[Eruptor]] (Series 2) | ||
|[[File:Eruptorwowpowpower.png|frameless]] | |||
|'''Lava Barf!''' | |'''Lava Barf!''' | ||
Hold Attack 3 to charge up a powerful stream of projectile lava barf. | Hold Attack 3 to charge up a powerful stream of projectile lava barf. | ||
|'''Lava Stream''' | |'''Lava Stream''' | ||
Hold Down (Y) to charge a stream of lava that damages enemies | Hold Down (Y) to charge a stream of lava that damages enemies. | ||
|- | |- | ||
|[[File:Flameslinger S2 Icon.png|frameless|100x100px]] | |||
|[[Flameslinger]] (Series 2) | |[[Flameslinger]] (Series 2) | ||
|[[File:Flameslingerwowpowpower.png|frameless]] | |||
|'''Speed Demon!''' | |'''Speed Demon!''' | ||
While dashing, press Attack 1 to run even faster and leave a new flame trail. | While dashing, press Attack 1 to run even faster and leave a new flame trail. | ||
|''To be added'' | |''To be added'' | ||
|- | |- | ||
|[[File:Slam Bam S2 Icon.png|frameless|100x100px]][[File:Legendary Slam Bam Icon.png|frameless|100x100px]] | |||
|[[Slam Bam]] (Series 2) | |[[Slam Bam]] (Series 2) | ||
[[Legendary Slam Bam]] (Series 2) | [[Legendary Slam Bam]] (Series 2) | ||
|[[File:Slam Bamwowpowpower.png|frameless]] | |||
|'''Sleigh Me!''' | |'''Sleigh Me!''' | ||
Hold Attack 3 to take a ride on a powerful ice sleigh. | Hold Attack 3 to take a ride on a powerful ice sleigh. | ||
| Line 66: | Line 81: | ||
Sprinting (A) brings up an icicle-spiked shield that damages enemies. | Sprinting (A) brings up an icicle-spiked shield that damages enemies. | ||
|- | |- | ||
|[[File:Zap S2 Icon.png|frameless|100x100px]] | |||
|[[Zap]] (Series 2) | |[[Zap]] (Series 2) | ||
|[[File:Zapwowpowpower.png|frameless]] | |||
|'''For Riley!''' | |'''For Riley!''' | ||
| Line 74: | Line 91: | ||
While sprinting (A), press (X) to perform a powerful area of effect attack. | While sprinting (A), press (X) to perform a powerful area of effect attack. | ||
|- | |- | ||
|[[File:Gill Grunt S2 Icon.png|frameless|100x100px]] | |||
|[[Gill Grunt]] (Series 2) | |[[Gill Grunt]] (Series 2) | ||
|[[File:Gill Gruntwowpowpower.png|frameless]] | |||
|'''Anchor's Away!''' | |'''Anchor's Away!''' | ||
Hold Attack 1 and release to fire three giant anchors. | Hold Attack 1 and release to fire three giant anchors. | ||
| Line 80: | Line 99: | ||
Harpoon Gun (Y) now fires an anchor that pierces through nemies in its path. | Harpoon Gun (Y) now fires an anchor that pierces through nemies in its path. | ||
|- | |- | ||
|[[File:Cynder S2 Icon.png|frameless|100x100px]] | |||
|[[Cynder]] (Series 2) | |[[Cynder]] (Series 2) | ||
|[[File:Cynderwowpowpower.png|frameless]] | |||
|'''Lightning Rain!''' | |'''Lightning Rain!''' | ||
While flying, press Attack 2 to bring a great lightning blast down from the sky. | While flying, press Attack 2 to bring a great lightning blast down from the sky. | ||
| Line 86: | Line 107: | ||
While Jumping (B), press (Y) to call down a bolt of lightning that damages nearby enemies. | While Jumping (B), press (Y) to call down a bolt of lightning that damages nearby enemies. | ||
|- | |- | ||
|[[File:Chop Chop S2 Icon.png|frameless|100x100px]] | |||
|[[Chop Chop]] (Series 2) | |[[Chop Chop]] (Series 2) | ||
|[[File:Chop Chopwowpowpower.png|frameless]] | |||
|'''Shield Skewer!''' | |'''Shield Skewer!''' | ||
Hold Attack 2 and press Attack 1 to burst forward in a mega shield bash attack. | Hold Attack 2 and press Attack 1 to burst forward in a mega shield bash attack. | ||
| Line 92: | Line 115: | ||
Damage and range of Chop Chop's shield while sprinting (A) are increased. | Damage and range of Chop Chop's shield while sprinting (A) are increased. | ||
|- | |- | ||
|[[File:Hex S2 Icon.png|frameless|100x100px]] | |||
|[[Hex]] (Series 2) | |[[Hex]] (Series 2) | ||
|[[File:Hexwowpowpower.png|frameless]] | |||
|'''Skull Buddy!''' | |'''Skull Buddy!''' | ||
Hold Attack 2 to charge up a Skull Storm, then press Attack 1 to conjure a giant skull pal. | Hold Attack 2 to charge up a Skull Storm, then press Attack 1 to conjure a giant skull pal. | ||
| Line 99: | Line 124: | ||
Hold (X) to full charge, then press (Y) to set down a skull turret that will attack nearby enemies. | Hold (X) to full charge, then press (Y) to set down a skull turret that will attack nearby enemies. | ||
|- | |- | ||
|[[File:Drill Sergeant S2 Icon.png|frameless|100x100px]] | |||
|[[Drill Sergeant]] (Series 2) | |[[Drill Sergeant]] (Series 2) | ||
|[[File:Drill Sergeantwowpowpower.png|frameless]] | |||
|'''Futurecannon!''' | |'''Futurecannon!''' | ||
Hold Attack 3 to fire energy pulses that haven't been invented yet. | Hold Attack 3 to fire energy pulses that haven't been invented yet. | ||
| Line 106: | Line 133: | ||
Pulse Cannon (X) fires stronger projectiles. | Pulse Cannon (X) fires stronger projectiles. | ||
|- | |- | ||
|[[File:Trigger Happy S2 Icon.png|frameless|100x100px]] | |||
|[[Trigger Happy]] (Series 2) | |[[Trigger Happy]] (Series 2) | ||
|[[File:Trigger Happywowpowpower.png|frameless]] | |||
|'''Megablast!''' | |'''Megablast!''' | ||
While using the mini-gun, press Attack 1 for a super blast. | While using the mini-gun, press Attack 1 for a super blast. | ||
| Line 113: | Line 142: | ||
Trigger Happy's Minigun (X) now deals more damage. | Trigger Happy's Minigun (X) now deals more damage. | ||
|- | |- | ||
|[[File:Drobot S2 Icon.png|frameless|100x100px]] | |||
|[[Drobot]] (Series 2) | |[[Drobot]] (Series 2) | ||
|[[File:Drobotwowpowpower.png|frameless]] | |||
|'''Supreme Bladegear!''' | |'''Supreme Bladegear!''' | ||
Hold Attack 2 to combine Bladegears into one controllable Super Bladegear! | Hold Attack 2 to combine Bladegears into one controllable Super Bladegear! | ||
| Line 119: | Line 150: | ||
Sprocket Launch (X) now fires a single, larger sprocket that pierces through enemies. | Sprocket Launch (X) now fires a single, larger sprocket that pierces through enemies. | ||
|- | |- | ||
|[[File:Stealth Elf S2 Icon.png|frameless|100x100px]][[File:Legendary Stealth Elf Icon.png|frameless|100x100px]] | |||
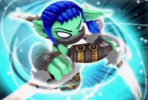
|[[Stealth Elf]] (Series 2) | |[[Stealth Elf]] (Series 2) | ||
[[Legendary Stealth Elf]] (Series 2) | [[Legendary Stealth Elf]] (Series 2) | ||
|[[File:Stealth Elfwowpowpower.png|frameless]] | |||
|'''Knife Blender!''' | |'''Knife Blender!''' | ||
Hold Attack 1 to unleash a mega 360-degree knife slash attack. | Hold Attack 1 to unleash a mega 360-degree knife slash attack. | ||
| Line 126: | Line 161: | ||
Hold (Y) and release to perform a spin attack that damages nearby enemies. | Hold (Y) and release to perform a spin attack that damages nearby enemies. | ||
|- | |- | ||
|[[File:Zook S2 Icon.png|frameless|100x100px]] | |||
|[[Zook]] (Series 2) | |[[Zook]] (Series 2) | ||
|[[File:Zookwowpowpower.png|frameless]] | |||
|'''Target Lock!''' | |'''Target Lock!''' | ||
Hold Attack 3 to bring up a targeting reticle, and press Attack 1 to hit that target with a full mortar. | Hold Attack 3 to bring up a targeting reticle, and press Attack 1 to hit that target with a full mortar. | ||
| Line 132: | Line 169: | ||
All bazooka attack now deal extra damage and have larger explosions! | All bazooka attack now deal extra damage and have larger explosions! | ||
|- | |- | ||
|[[File:Stump Smash S2 Icon.png|frameless|100x100px]] | |||
|[[Stump Smash]] (Series 2) | |[[Stump Smash]] (Series 2) | ||
|[[File:Stump Smashwowpowpower.png|frameless]] | |||
|'''Auto-Nuts!''' | |'''Auto-Nuts!''' | ||
Hold Attack 2 to rapidly spit out a series of nuts. | Hold Attack 2 to rapidly spit out a series of nuts. | ||
| Line 138: | Line 177: | ||
Hold (X) to fire spore pods rapidly. | Hold (X) to fire spore pods rapidly. | ||
|- | |- | ||
|[[File:Terrafin S2 Icon.png|frameless|100x100px]] | |||
|[[Terrafin]] (Series 2) | |[[Terrafin]] (Series 2) | ||
|[[File:Terrafinwowpowpower.png|frameless]] | |||
|'''Dive Burrow!''' | |'''Dive Burrow!''' | ||
While in the air for a bellyflop, press Attack 2 to immediately dive back underground. | While in the air for a bellyflop, press Attack 2 to immediately dive back underground. | ||
|''To be added'' | |''To be added'' | ||
|- | |- | ||
|[[File:Bash S2 Icon.png|frameless|100x100px]] | |||
|[[Bash]] (Series 2) | |[[Bash]] (Series 2) | ||
|[[File:Bashwowpowpower.png|frameless|143x143px]] | |||
|'''Rolling Thunder!''' | |'''Rolling Thunder!''' | ||
While rolling, press Attack 2 to launch into the air and slam down. | While rolling, press Attack 2 to launch into the air and slam down. | ||
| Line 149: | Line 192: | ||
Jumping (B) while sprinting (A) will spawn rock fist that will damage nearby enemies. | Jumping (B) while sprinting (A) will spawn rock fist that will damage nearby enemies. | ||
|- | |- | ||
|[[File:Prism Break S2 Icon.png|frameless|100x100px]] | |||
|[[Prism Break]] (Series 2) | |[[Prism Break]] (Series 2) | ||
|[[File:Prism Breakwowpowpower.png|frameless]] | |||
|'''Pulse Power!''' | |'''Pulse Power!''' | ||
While holding Attack 1, press Attack 2 to send a powerful pulse down the beam. | While holding Attack 1, press Attack 2 to send a powerful pulse down the beam. | ||
| Line 155: | Line 200: | ||
While firing Gemcutter (Y), press (X) to fire a pulse of of energy that epxlodes, dealing extra damage | While firing Gemcutter (Y), press (X) to fire a pulse of of energy that epxlodes, dealing extra damage | ||
|- | |- | ||
|[[File:Sonic Boom S2 Icon.png|frameless|100x100px]] | |||
|[[Sonic Boom]] (Series 2) | |[[Sonic Boom]] (Series 2) | ||
|[[File:Sonic Boomwowpowpower.png|frameless]] | |||
|'''Super Baby!''' | |'''Super Baby!''' | ||
Hold Attack 2 to combine regular babies into one Super Baby! Lasts for about 1 minute. | Hold Attack 2 to combine regular babies into one Super Baby! Lasts for about 1 minute. | ||
|''To be added'' | |''To be added'' | ||
|- | |- | ||
|[[File:Whirlwind S2 Icon.png|frameless|100x100px]][[File:Polar Whirlwind Icon.png|frameless|100x100px]] | |||
|[[Whirlwind]] (Series 2) | |[[Whirlwind]] (Series 2) | ||
[[Polar Whirlwind]] (Series 2) | [[Polar Whirlwind]] (Series 2) | ||
|[[File:Whirlwindwowpowpower.png|frameless]] | |||
|'''Cloudbursting!''' | |'''Cloudbursting!''' | ||
When clouds disappear, they explode into rainbows. | When clouds disappear, they explode into rainbows. | ||
| Line 168: | Line 219: | ||
Tempest Clouds fire off three rainbow strikes when they expire. | Tempest Clouds fire off three rainbow strikes when they expire. | ||
|- | |- | ||
|[[File:Lightning Rod S2 Icon.png|frameless|100x100px]] | |||
|[[Lightning Rod]] (Series 2) | |[[Lightning Rod]] (Series 2) | ||
|[[File:Lightning Rodwowpowpower.png|frameless|145x145px]] | |||
|'''Big Bolt!''' | |'''Big Bolt!''' | ||
Hold Attack 1 to throw the biggest bolt of lightning known to man! | Hold Attack 1 to throw the biggest bolt of lightning known to man! | ||
| Line 177: | Line 230: | ||
{| class="article-table" | {| class="article-table" | ||
|+[[Skylanders: Swap Force|''Skylanders: Swap Force'']] | |+[[Skylanders: Swap Force|''Skylanders: Swap Force'']] | ||
!Skylander | ! colspan="2" |Skylander | ||
!Consoles | ! colspan="2" |Consoles | ||
!3DS | !3DS | ||
|- | |- | ||
|[[File:Mega Ram Spyro Icon.png|frameless|100x100px]][[File:Dark Mega Ram Spyro Icon.png|frameless|100x100px]] | |||
|[[Spyro|Mega Ram Spyro]] (Series 3) | |[[Spyro|Mega Ram Spyro]] (Series 3) | ||
[[Dark Spyro|Dark Mega Ram Spyro]] (Series 3) | [[Dark Spyro|Dark Mega Ram Spyro]] (Series 3) | ||
|[[File:Spyrowowpow2power.png|frameless]] | |||
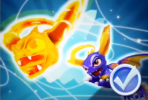
|'''Head Start!''' | |'''Head Start!''' | ||
Summon a magic worm ally at the end of your charge and send it after your enemies. | Summon a magic worm ally at the end of your charge and send it after your enemies. | ||
| Line 188: | Line 245: | ||
Press (X) to release a blast of magical energy from Spyro's horns. | Press (X) to release a blast of magical energy from Spyro's horns. | ||
|- | |- | ||
|[[File:Super Gulp Pop Fizz Icon.png|frameless|100x100px]] | |||
|[[Pop Fizz|Super Gulp Pop Fizz]] (Series 2) | |[[Pop Fizz|Super Gulp Pop Fizz]] (Series 2) | ||
|[[File:Pop Fizzwowpowpower.png|frameless]] | |||
|'''Beaker Buddy!''' | |'''Beaker Buddy!''' | ||
| Line 194: | Line 253: | ||
|''To be added'' | |''To be added'' | ||
|- | |- | ||
|[[File:Lava Barf Eruptor Icon.png|frameless|100x100px]][[File:Volcanic Eruptor Icon.png|frameless|100x100px]] | |||
|[[Eruptor|Lava Barf Eruptor]] (Series 3) | |[[Eruptor|Lava Barf Eruptor]] (Series 3) | ||
[[Volcanic Eruptor]] (Series 3) | [[Volcanic Eruptor]] (Series 3) | ||
|[[File:Eruptorwowpow2power.png|frameless]] | |||
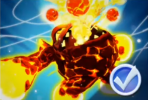
|'''Lava Barf 2: Barf Harder!''' | |'''Lava Barf 2: Barf Harder!''' | ||
Press Attack 3 to release Magma Balls, then hold Attack 3 to eat them and immediately barf them back for extra damage. | Press Attack 3 to release Magma Balls, then hold Attack 3 to eat them and immediately barf them back for extra damage. | ||
| Line 201: | Line 264: | ||
Hold down (Y) to build up a charge of super-heated volcanic rocks. Releasing (Y) or reaching maximum charge will cause Eruptor to spew forth fireballs that leave patches of lava where they land. | Hold down (Y) to build up a charge of super-heated volcanic rocks. Releasing (Y) or reaching maximum charge will cause Eruptor to spew forth fireballs that leave patches of lava where they land. | ||
|- | |- | ||
|[[File:Fire Bone Hot Dog Icon.png|frameless|100x100px]] | |||
|[[Hot Dog|Fire Bone Hot Dog]] (Series 2) | |[[Hot Dog|Fire Bone Hot Dog]] (Series 2) | ||
|[[File:Hot Dogwowpowpower.png|frameless]] | |||
|'''Bees! Bees! Bees!''' | |'''Bees! Bees! Bees!''' | ||
Hold Attack 1 then release to fire a super powerful blast of bees. | Hold Attack 1 then release to fire a super powerful blast of bees. | ||
| Line 208: | Line 273: | ||
Hold (Y) to build up a charge. Release (Y) to launch a flaming bee that bursts into three smaller flaming bees that find and seek out enemies. | Hold (Y) to build up a charge. Release (Y) to launch a flaming bee that bursts into three smaller flaming bees that find and seek out enemies. | ||
|- | |- | ||
|[[File:Anchors Away Gill Grunt Icon.png|frameless|100x100px]] | |||
|[[Gill Grunt|Anchors Away Gill Grunt]] (Series 3) | |[[Gill Grunt|Anchors Away Gill Grunt]] (Series 3) | ||
|[[File:Gill Gruntwowpow2power.png|frameless]] | |||
|'''Anchor Management!''' | |'''Anchor Management!''' | ||
Charge up the Anchor Cannon and press Attack 2 to do special damage. | Charge up the Anchor Cannon and press Attack 2 to do special damage. | ||
| Line 215: | Line 282: | ||
Hold (Y) to begin charging a giant anchor. When anchor is fully charged, release (Y) to launch it into the air, landing nearby. While on the ground, the anchor will spin, pulling in nearby enemies and damaging them. | Hold (Y) to begin charging a giant anchor. When anchor is fully charged, release (Y) to launch it into the air, landing nearby. While on the ground, the anchor will spin, pulling in nearby enemies and damaging them. | ||
|- | |- | ||
|[[File:Blizzard Chill Icon.png|frameless|100x100px]] | |||
|[[Chill|Blizzard Chill]] (Series 2) | |[[Chill|Blizzard Chill]] (Series 2) | ||
|[[File:Chillwowpowpower.png|frameless]] | |||
|'''Orcastration!''' | |'''Orcastration!''' | ||
Hold Attack 2 longer and mini orcas appear inside the ice wall, then release to shatter the wall and launch orcas. | Hold Attack 2 longer and mini orcas appear inside the ice wall, then release to shatter the wall and launch orcas. | ||
| Line 221: | Line 290: | ||
Hold (X) to fill Ice Walls with Orcas. When all of the newest Ice Walls are filled or (X) is released, the Orcas will explode out of the Ice Walls and dive bomb nearby enemies. | Hold (X) to fill Ice Walls with Orcas. When all of the newest Ice Walls are filled or (X) is released, the Orcas will explode out of the Ice Walls and dive bomb nearby enemies. | ||
|- | |- | ||
|[[File:Twin Blade Chop Chop Icon.png|frameless|100x100px]] | |||
|[[Chop Chop|Twin Blade Chop Chop]] (Series 3) | |[[Chop Chop|Twin Blade Chop Chop]] (Series 3) | ||
|[[File:Chop Chopwowpow2power.png|frameless]] | |||
|'''Dice and Slice!''' | |'''Dice and Slice!''' | ||
Hold Attack 1 to charge up Dual Sword Mode, then release a furious, two-sword attack. | Hold Attack 1 to charge up Dual Sword Mode, then release a furious, two-sword attack. | ||
| Line 228: | Line 299: | ||
Hold (Y) to swap Chop Chop's shield with a second sword. Release (Y) to perform a spinning attack for a short time. | Hold (Y) to swap Chop Chop's shield with a second sword. Release (Y) to perform a spinning attack for a short time. | ||
|- | |- | ||
|[[File:Phantom Cynder Icon.png|frameless|100x100px]] | |||
|[[Cynder|Phantom Cynder]] (Series 3 | |[[Cynder|Phantom Cynder]] (Series 3 | ||
|[[File:Cynderwowpow2power.png|frameless]] | |||
|'''Skull Splosion!''' | |'''Skull Splosion!''' | ||
While in a Shadow Dash, hold Attack 2 to morph into a giant skull, which explodes on release. | While in a Shadow Dash, hold Attack 2 to morph into a giant skull, which explodes on release. | ||
|''To be added'' | |''To be added'' | ||
|- | |- | ||
|[[File:Big Bang Trigger Happy Icon.png|frameless|100x100px]][[File:Springtime Trigger Happy Icon.png|frameless|100x100px]] | |||
|[[Trigger Happy|Big Bang Trigger Happy]] (Series 3) | |[[Trigger Happy|Big Bang Trigger Happy]] (Series 3) | ||
[[Springtime Trigger Happy]] (Series 3) | [[Springtime Trigger Happy]] (Series 3) | ||
|[[File:Trigger Happywowpow2power.png|frameless]] | |||
|'''Rocket Ride!''' | |'''Rocket Ride!''' | ||
While holding Attack 1, press and hold Attack 2 to charge up a golden rocket, then release to ride it as a missile. | While holding Attack 1, press and hold Attack 2 to charge up a golden rocket, then release to ride it as a missile. | ||
| Line 241: | Line 318: | ||
Trigger Happy will summon a large rocket while sprinting (A). When the sprint ends, the rockets will fire off and explode into enemies. | Trigger Happy will summon a large rocket while sprinting (A). When the sprint ends, the rockets will fire off and explode into enemies. | ||
|- | |- | ||
|[[File:Heavy Duty Sprocket Icon.png|frameless|100x100px]] | |||
|[[Sprocket|Heavy Duty Sprocket]] (Series 2) | |[[Sprocket|Heavy Duty Sprocket]] (Series 2) | ||
|[[File:Sprocketwowpowpower.png|frameless]] | |||
|'''Tanks For The New Toy!''' | |'''Tanks For The New Toy!''' | ||
While driving a tank, hold Attack 2 to fire a Tesla Cannon. Turrets and Tank do increased damage. | While driving a tank, hold Attack 2 to fire a Tesla Cannon. Turrets and Tank do increased damage. | ||
| Line 247: | Line 326: | ||
Sprocket now summons golden turrets and tanks. | Sprocket now summons golden turrets and tanks. | ||
|- | |- | ||
|[[File:Ninja Stealth Elf Icon.png|frameless|100x100px]][[File:Dark Stealth Elf Icon.png|frameless|100x100px]] | |||
|[[Stealth Elf|Ninja Stealth Elf]] (Series 3) | |[[Stealth Elf|Ninja Stealth Elf]] (Series 3) | ||
[[Dark Stealth Elf]] (Series 3) | [[Dark Stealth Elf]] (Series 3) | ||
|[[File:Stealth Elfwowpow2power.png|frameless]] | |||
|'''Surprise Tiger!''' | |'''Surprise Tiger!''' | ||
While invisible, press Attack 3 to summon a powerful tiger ally. Also unlocks Ninja costume! | While invisible, press Attack 3 to summon a powerful tiger ally. Also unlocks Ninja costume! | ||
|''To be added'' | |''To be added'' | ||
|- | |- | ||
|[[File:Thorn Horn Camo Icon.png|frameless|100x100px]] | |||
|[[Camo|Thorn Horn Camo]] (Series 2) | |[[Camo|Thorn Horn Camo]] (Series 2) | ||
|[[File:Camowowpowpower.png|frameless]] | |||
|'''Explosive Harvest!''' | |'''Explosive Harvest!''' | ||
Any melons can turn into explosive SUPERMELONS and launch at enemies. | Any melons can turn into explosive SUPERMELONS and launch at enemies. | ||
| Line 259: | Line 344: | ||
Melon Bombs (X) sometimes become Slaughtermelons. When Slaughtermelons explode, they spawn more Melon Bombs. | Melon Bombs (X) sometimes become Slaughtermelons. When Slaughtermelons explode, they spawn more Melon Bombs. | ||
|- | |- | ||
|[[File:Hyper Beam Prism Break Icon.png|frameless|100x100px]] | |||
|[[Prism Break|Hyper Beam Prism Break]] (Series 3) | |[[Prism Break|Hyper Beam Prism Break]] (Series 3) | ||
|[[File:Prism Breakwowpow2power.png|frameless]] | |||
|'''Crystal Comrade!''' | |'''Crystal Comrade!''' | ||
Press Attack 1 to shoot Crystal Shards and gem shrapnel explode out, damaging enemies and looking cool. | Press Attack 1 to shoot Crystal Shards and gem shrapnel explode out, damaging enemies and looking cool. | ||
| Line 265: | Line 352: | ||
Gemcutter (Y) will now chip off pieces of the gem that will shoot off towards nearby enemies. | Gemcutter (Y) will now chip off pieces of the gem that will shoot off towards nearby enemies. | ||
|- | |- | ||
|[[File:Knockout Terrafin Icon.png|frameless|100x100px]] | |||
|[[Terrafin|Knockout Terrafin]] (Series 3) | |[[Terrafin|Knockout Terrafin]] (Series 3) | ||
|[[File:Terrafinwowpow2power.png|frameless]] | |||
|'''Have You Met My Kids?''' | |'''Have You Met My Kids?''' | ||
While burrowed, press Attack 3 to launch at enemies and hit them with a claw swipe move as well as with mini-shark allies. | While burrowed, press Attack 3 to launch at enemies and hit them with a claw swipe move as well as with mini-shark allies. | ||
|''To be added'' | |''To be added'' | ||
|- | |- | ||
|[[File:Horn Blast Whirlwind Icon.png|frameless|100x100px]] | |||
|[[Whirlwind|Horn Blast Whirlwind]] (Series 3) | |[[Whirlwind|Horn Blast Whirlwind]] (Series 3) | ||
|[[File:Whirlwindwowpow2power.png|frameless]] | |||
|'''Rainbow Rush!''' | |'''Rainbow Rush!''' | ||
Hold Attack 3 to take flight and release powerful rainbow shockwaves with each wing flap. | Hold Attack 3 to take flight and release powerful rainbow shockwaves with each wing flap. | ||
| Line 277: | Line 368: | ||
Hold (X) to unleash the powerful Rainbow Wave attack that pushes back and damages enemies. | Hold (X) to unleash the powerful Rainbow Wave attack that pushes back and damages enemies. | ||
|- | |- | ||
|[[File:Turbo Jet-Vac Icon.png|frameless|100x100px]] | |||
|[[Jet-Vac|Turbo Jet-Vac]] (Series 2) | |[[Jet-Vac|Turbo Jet-Vac]] (Series 2) | ||
|[[File:Jet-Vacwowpowpower.png|frameless]] | |||
|'''Shoot The Breeze!''' | |'''Shoot The Breeze!''' | ||
Hold Attack 1 to charge up the Vac Blaster, then release to release a gigantic tornado. | Hold Attack 1 to charge up the Vac Blaster, then release to release a gigantic tornado. | ||
| Line 286: | Line 379: | ||
{| class="article-table" | {| class="article-table" | ||
|+[[Skylanders: Trap Team|''Skylanders: Trap Team'']] | |+[[Skylanders: Trap Team|''Skylanders: Trap Team'']] | ||
!Skylander | ! colspan="2" |Skylander | ||
!Consoles | ! colspan="2" |Consoles | ||
!3DS | !3DS | ||
|- | |- | ||
|[[File:Fizzy Frenzy Pop Fizz Icon.png|frameless|100x100px]][[File:Love Potion Pop Fizz Icon.png|frameless|100x100px]] | |||
|[[Pop Fizz|Fizzy Frenzy Pop Fizz]] (Series 3) | |[[Pop Fizz|Fizzy Frenzy Pop Fizz]] (Series 3) | ||
[[Love Potion Pop Fizz]] (Series 3) | [[Love Potion Pop Fizz]] (Series 3) | ||
|[[File:Pop Fizzwowpow2power.png|frameless]] | |||
|'''Oversize ME!''' | |'''Oversize ME!''' | ||
Tap Attack 2 repeatedly to swallow a potion whole and become a Super Beast with overload abilities. | Tap Attack 2 repeatedly to swallow a potion whole and become a Super Beast with overload abilities. | ||
| Line 297: | Line 394: | ||
Repeatedly press (X) to swallow a potion whole and become a Super Beast with overloaded attacks. | Repeatedly press (X) to swallow a potion whole and become a Super Beast with overloaded attacks. | ||
|- | |- | ||
|[[File:Tidal Wave Gill Grunt Icon.png|frameless|100x100px]] | |||
|[[Gill Grunt|Tidal Wave Gill Grunt]] (Series 4) | |[[Gill Grunt|Tidal Wave Gill Grunt]] (Series 4) | ||
|[[File:Gill Gruntwowpow3power.png|frameless]] | |||
|'''Ride The Leviathan!''' | |'''Ride The Leviathan!''' | ||
In Jet Pack mode, press Attack 2 to ride a giant Leviathan, taking out anything in its path. | In Jet Pack mode, press Attack 2 to ride a giant Leviathan, taking out anything in its path. | ||
| Line 303: | Line 402: | ||
Hold (Y) to summon a leviathan and ride him through your enemies. | Hold (Y) to summon a leviathan and ride him through your enemies. | ||
|- | |- | ||
|[[File:Hog Wild Fryno Icon.png|frameless|100x100px]] | |||
|[[Fryno|Hog Wild Fryno]] (Series 2) | |[[Fryno|Hog Wild Fryno]] (Series 2) | ||
|[[File:Frynowowpowpower.png|frameless|142x142px]] | |||
|'''Burning Rubber!''' | |'''Burning Rubber!''' | ||
While riding the motorcycle, hold Attack 2 to go into a power drift, blasting enemies with molten rocks. | While riding the motorcycle, hold Attack 2 to go into a power drift, blasting enemies with molten rocks. | ||
| Line 310: | Line 411: | ||
While riding the motorcycle, press (X) to go into a power drift, blasting enemies with molten rocks. | While riding the motorcycle, press (X) to go into a power drift, blasting enemies with molten rocks. | ||
|- | |- | ||
|[[File:Sure Shot Shroomboom Icon.png|frameless|100x100px]] | |||
|[[Shroomboom|Sure Shot Shroomboom]] (Series 2) | |[[Shroomboom|Sure Shot Shroomboom]] (Series 2) | ||
|[[File:Shroomboomwowpowpower.png|frameless]] | |||
|'''High Spore!''' | |'''High Spore!''' | ||
Hold Attack 1 to create mushroom bumpers and play pinball with enemies. | Hold Attack 1 to create mushroom bumpers and play pinball with enemies. | ||
| Line 316: | Line 419: | ||
Hold (Y) to stick a giant Slingshot in the ground and use Shroomboom as munition. If (Y) is released when it's fully charged, Shroomboom will bounce on all the nearby baddies. If it's released too soon, he won't. | Hold (Y) to stick a giant Slingshot in the ground and use Shroomboom as munition. If (Y) is released when it's fully charged, Shroomboom will bounce on all the nearby baddies. If it's released too soon, he won't. | ||
|- | |- | ||
|[[File:Full Blast Jet-Vac Icon.png|frameless|100x100px]] | |||
|[[Jet-Vac|Full Blast Jet-Vac]] (Series 3) | |[[Jet-Vac|Full Blast Jet-Vac]] (Series 3) | ||
|[[File:Jet-Vacwowpow2power.png|frameless]] | |||
|'''Double Barrel!''' | |'''Double Barrel!''' | ||
While flying, swap the Vac Blaster for two superpowered guns and hold Attack 1 to fire continuously until they overheat. | While flying, swap the Vac Blaster for two superpowered guns and hold Attack 1 to fire continuously until they overheat. | ||
| Line 329: | Line 434: | ||
==Trivia== | ==Trivia== | ||
*When placing a Series 3 or Series 4 Skylanders into previous games, they will have their older Wow Pows available instead of their current ones. Placing them back to their respective current game will revert them back to their default Wow Pow. | |||
*While LightCore Skylanders and Eon's Elites are revised characters from their original, they do not possess Wow Pows and should not be confused with the Series revisions. | |||
**In ''Skylanders Giants'', Eon's Elites will appear as "Series 2 Special" and thus will have access to their Wow Pow if available as well as being able to change paths. However, the Wow Pow won't get carried over to later games however. | |||
*Some Wow Pows are slightly altered for the 3DS version due to different movesets compared to consoles. | |||
*Interestingly, on the 3DS version of ''Giants'', Wow Pows aren't listed in the upgrades for any of the Series 2 Skylanders, but the Wow Pows does exist in-game. In later games however, descriptions were added. | *Interestingly, on the 3DS version of ''Giants'', Wow Pows aren't listed in the upgrades for any of the Series 2 Skylanders, but the Wow Pows does exist in-game. In later games however, descriptions were added. | ||
*On 3DS version of ''Swap Force'' and ''Trap Team'', some Wow Pows are locked from preview and thus requires said figure to unlock, while the majority of Skylanders | *On the 3DS version of ''Swap Force'' and ''Trap Team'', some Wow Pows are locked from preview and thus requires said figure to unlock, while the majority of Skylanders with Wow Pows can be previewed right away, regardless of whether the player owns the figures or not. | ||
*Although Dark Spyro has different moveset compared to regular Spyro for the 3DS, their Series 3 Wow Pow are both the same. | *Although Dark Spyro has different moveset compared to regular Spyro for the 3DS, their Series 3 Wow Pow are both the same. | ||
Revision as of 12:20, April 18, 2021
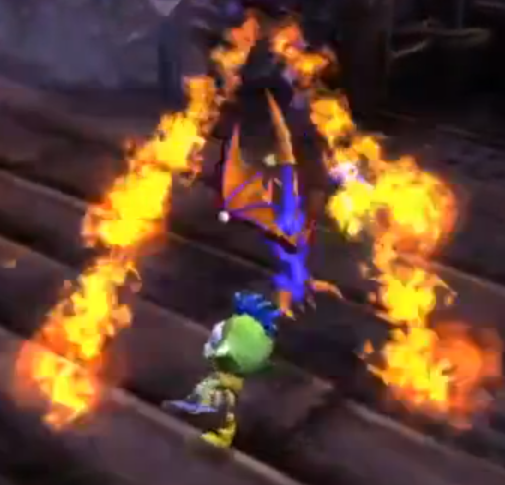
Wow Pow is an additional upgrade power that are given to returning, fan-favorite Skylanders in the Skylanders series.
Details
With the release of Skylanders: Giants, Skylanders: Swap Force and Skylanders: Trap Team, a number of fan-favorite Skylanders from past games gets re-released in the form of revisions, which includes their new Wow Pow in addition to having an updated design for their toys and promotional arts, with the majority of them having some of their in-game upgrades visible. Wow Pows are also available for variants of the revised Skylander.
Unlike Soul Gem upgrades, Wow Pows don't require any additional item to be unlocked and are already accessible through normal upgrading. However, some Wow Pows may require past upgrades in order to work.
In Giants, the Skylanders were only acknowledged as "Series 2", whereas in Swap Force and Trap Team, every revised Skylanders released for these games received additional names for them.
List of Wow Pow
| Skylander | Consoles | 3DS | ||
|---|---|---|---|---|
| Spyro (Series 2) | 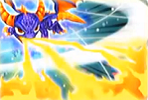
|
Fireslam!
While flying, press Attack 2 to allow Spyro to shoot fireballs and perform a flaming slam. |
Rain of Fire
Fireballs (Y) that are launched in the air are automatically powered up. | |
| Wrecking Ball (Series 2) | 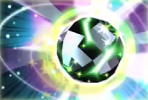
|
Disco Ball!
Press Attack 2 to turn Wrecking Ball's Force Field into a magical disco ball. |
To be added | |
| Double Trouble (Series 2)
|
|
Triple Trouble!
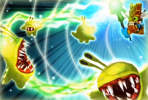
Eldritch Beam splits off into three separate beams when it locks on an enemy. |
Triple Threat
Lightning Staff (Y) now casts three electric bolts that spin around Double Drouble. | |
| Ignitor (Series 2)
|
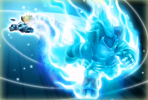
|
Blue Flame!
After executing Flame Form or Mega Slam attacks, Ignitor leaves a trail of blue fire. |
Flaming Minion
Fire Spirit (X) now leaves behind flaming traps that damage enemies. | |
| Eruptor (Series 2) | 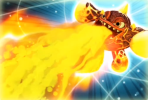
|
Lava Barf!
Hold Attack 3 to charge up a powerful stream of projectile lava barf. |
Lava Stream
Hold Down (Y) to charge a stream of lava that damages enemies. | |
| Flameslinger (Series 2) | 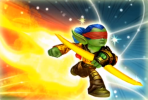
|
Speed Demon!
While dashing, press Attack 1 to run even faster and leave a new flame trail. |
To be added | |
| Slam Bam (Series 2)
|
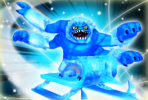
|
Sleigh Me!
Hold Attack 3 to take a ride on a powerful ice sleigh. |
Icicle Charge
Sprinting (A) brings up an icicle-spiked shield that damages enemies. | |
| Zap (Series 2) | 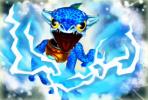
|
For Riley!
While riding a wave, press Attack 2 to make a big splash. |
Splash
While sprinting (A), press (X) to perform a powerful area of effect attack. | |
| Gill Grunt (Series 2) | 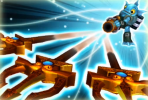
|
Anchor's Away!
Hold Attack 1 and release to fire three giant anchors. |
Drop Anchor
Harpoon Gun (Y) now fires an anchor that pierces through nemies in its path. | |
| Cynder (Series 2) | 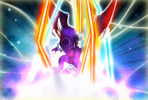
|
Lightning Rain!
While flying, press Attack 2 to bring a great lightning blast down from the sky. |
Crackling Blast
While Jumping (B), press (Y) to call down a bolt of lightning that damages nearby enemies. | |
| Chop Chop (Series 2) | 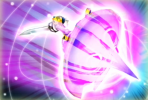
|
Shield Skewer!
Hold Attack 2 and press Attack 1 to burst forward in a mega shield bash attack. |
Shield of Undeath
Damage and range of Chop Chop's shield while sprinting (A) are increased. | |
| Hex (Series 2) | 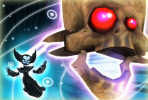
|
Skull Buddy!
Hold Attack 2 to charge up a Skull Storm, then press Attack 1 to conjure a giant skull pal. |
Shooting Skull
Hold (X) to full charge, then press (Y) to set down a skull turret that will attack nearby enemies. | |
| Drill Sergeant (Series 2) | 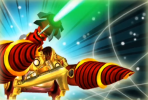
|
Futurecannon!
Hold Attack 3 to fire energy pulses that haven't been invented yet. |
Plasma Cannon
Pulse Cannon (X) fires stronger projectiles. | |
| Trigger Happy (Series 2) | 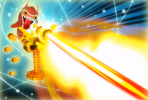
|
Megablast!
While using the mini-gun, press Attack 1 for a super blast. |
One Quarter More
Trigger Happy's Minigun (X) now deals more damage. | |
| Drobot (Series 2) | 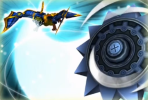
|
Supreme Bladegear!
Hold Attack 2 to combine Bladegears into one controllable Super Bladegear! |
Solid Metal Cog
Sprocket Launch (X) now fires a single, larger sprocket that pierces through enemies. | |
| Stealth Elf (Series 2)
|
|
Knife Blender!
Hold Attack 1 to unleash a mega 360-degree knife slash attack. |
Dagger Flurry
Hold (Y) and release to perform a spin attack that damages nearby enemies. | |
| Zook (Series 2) | 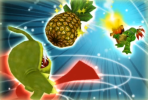
|
Target Lock!
Hold Attack 3 to bring up a targeting reticle, and press Attack 1 to hit that target with a full mortar. |
Bammo!
All bazooka attack now deal extra damage and have larger explosions! | |
| Stump Smash (Series 2) | 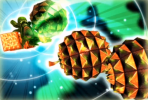
|
Auto-Nuts!
Hold Attack 2 to rapidly spit out a series of nuts. |
Rapid Fire Spores
Hold (X) to fire spore pods rapidly. | |
| Terrafin (Series 2) | 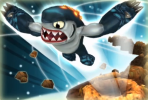
|
Dive Burrow!
While in the air for a bellyflop, press Attack 2 to immediately dive back underground. |
To be added | |
| Bash (Series 2) | 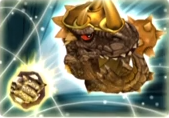
|
Rolling Thunder!
While rolling, press Attack 2 to launch into the air and slam down. |
Rock and Roll
Jumping (B) while sprinting (A) will spawn rock fist that will damage nearby enemies. | |
| Prism Break (Series 2) | 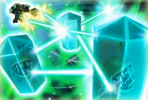
|
Pulse Power!
While holding Attack 1, press Attack 2 to send a powerful pulse down the beam. |
Laser Cutter
While firing Gemcutter (Y), press (X) to fire a pulse of of energy that epxlodes, dealing extra damage | |
| Sonic Boom (Series 2) | 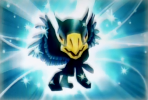
|
Super Baby!
Hold Attack 2 to combine regular babies into one Super Baby! Lasts for about 1 minute. |
To be added | |
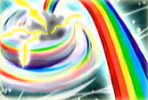
| Whirlwind (Series 2)
|
|
Cloudbursting!
When clouds disappear, they explode into rainbows. |
Rainbow Tempest
Tempest Clouds fire off three rainbow strikes when they expire. | |
| Lightning Rod (Series 2) | 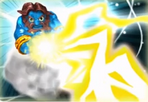
|
Big Bolt!
Hold Attack 1 to throw the biggest bolt of lightning known to man! |
Lightning Wave
Hold (Y) to launch a stream of lightning that damages enemies. | |
| Skylander | Consoles | 3DS | ||
|---|---|---|---|---|
| Mega Ram Spyro (Series 3)
|
|
Head Start!
Summon a magic worm ally at the end of your charge and send it after your enemies. |
Horn Blast
Press (X) to release a blast of magical energy from Spyro's horns. | |
| Super Gulp Pop Fizz (Series 2) | 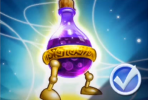
|
Beaker Buddy!
When throwing Purple Potions, one of them will grow into a giant, special pet. |
To be added | |
| Lava Barf Eruptor (Series 3)
|
|
Lava Barf 2: Barf Harder!
Press Attack 3 to release Magma Balls, then hold Attack 3 to eat them and immediately barf them back for extra damage. |
Mega Magma Balls
Hold down (Y) to build up a charge of super-heated volcanic rocks. Releasing (Y) or reaching maximum charge will cause Eruptor to spew forth fireballs that leave patches of lava where they land. | |
| Fire Bone Hot Dog (Series 2) | 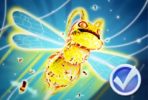
|
Bees! Bees! Bees!
Hold Attack 1 then release to fire a super powerful blast of bees. |
Fire Bees
Hold (Y) to build up a charge. Release (Y) to launch a flaming bee that bursts into three smaller flaming bees that find and seek out enemies. | |
| Anchors Away Gill Grunt (Series 3) | 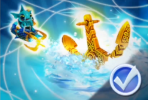
|
Anchor Management!
Charge up the Anchor Cannon and press Attack 2 to do special damage. |
Anchors Away
Hold (Y) to begin charging a giant anchor. When anchor is fully charged, release (Y) to launch it into the air, landing nearby. While on the ground, the anchor will spin, pulling in nearby enemies and damaging them. | |
| Blizzard Chill (Series 2) | 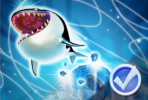
|
Orcastration!
Hold Attack 2 longer and mini orcas appear inside the ice wall, then release to shatter the wall and launch orcas. |
Whale Walls
Hold (X) to fill Ice Walls with Orcas. When all of the newest Ice Walls are filled or (X) is released, the Orcas will explode out of the Ice Walls and dive bomb nearby enemies. | |
| Twin Blade Chop Chop (Series 3) | 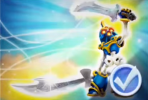
|
Dice and Slice!
Hold Attack 1 to charge up Dual Sword Mode, then release a furious, two-sword attack. |
Dual Bladed Flurry
Hold (Y) to swap Chop Chop's shield with a second sword. Release (Y) to perform a spinning attack for a short time. | |
| Phantom Cynder (Series 3 | 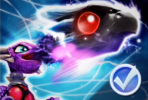
|
Skull Splosion!
While in a Shadow Dash, hold Attack 2 to morph into a giant skull, which explodes on release. |
To be added | |
| Big Bang Trigger Happy (Series 3)
|
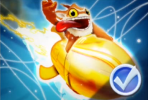
|
Rocket Ride!
While holding Attack 1, press and hold Attack 2 to charge up a golden rocket, then release to ride it as a missile. |
Exploding Balance
Trigger Happy will summon a large rocket while sprinting (A). When the sprint ends, the rockets will fire off and explode into enemies. | |
| Heavy Duty Sprocket (Series 2) | 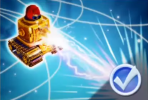
|
Tanks For The New Toy!
While driving a tank, hold Attack 2 to fire a Tesla Cannon. Turrets and Tank do increased damage. |
Chariot of Gold
Sprocket now summons golden turrets and tanks. | |
| Ninja Stealth Elf (Series 3)
|
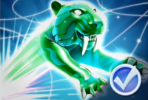
|
Surprise Tiger!
While invisible, press Attack 3 to summon a powerful tiger ally. Also unlocks Ninja costume! |
To be added | |
| Thorn Horn Camo (Series 2) | 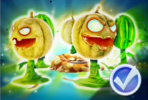
|
Explosive Harvest!
Any melons can turn into explosive SUPERMELONS and launch at enemies. |
Slaughtermelons
Melon Bombs (X) sometimes become Slaughtermelons. When Slaughtermelons explode, they spawn more Melon Bombs. | |
| Hyper Beam Prism Break (Series 3) | 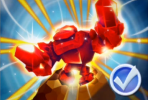
|
Crystal Comrade!
Press Attack 1 to shoot Crystal Shards and gem shrapnel explode out, damaging enemies and looking cool. |
Gem Chip
Gemcutter (Y) will now chip off pieces of the gem that will shoot off towards nearby enemies. | |
| Knockout Terrafin (Series 3) | 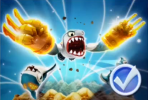
|
Have You Met My Kids?
While burrowed, press Attack 3 to launch at enemies and hit them with a claw swipe move as well as with mini-shark allies. |
To be added | |
| Horn Blast Whirlwind (Series 3) | 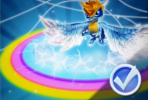
|
Rainbow Rush!
Hold Attack 3 to take flight and release powerful rainbow shockwaves with each wing flap. |
Rainbow Wave
Hold (X) to unleash the powerful Rainbow Wave attack that pushes back and damages enemies. | |
| Turbo Jet-Vac (Series 2) | 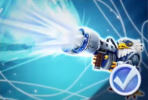
|
Shoot The Breeze!
Hold Attack 1 to charge up the Vac Blaster, then release to release a gigantic tornado. |
Twin Engine Power
Vac-Blaster (Y) fires double projectiles through a double barrel gun. | |
| Skylander | Consoles | 3DS | ||
|---|---|---|---|---|
| Fizzy Frenzy Pop Fizz (Series 3)
|

|
Oversize ME!
Tap Attack 2 repeatedly to swallow a potion whole and become a Super Beast with overload abilities. |
Oversize Me!
Repeatedly press (X) to swallow a potion whole and become a Super Beast with overloaded attacks. | |
| Tidal Wave Gill Grunt (Series 4) | 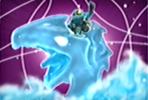
|
Ride The Leviathan!
In Jet Pack mode, press Attack 2 to ride a giant Leviathan, taking out anything in its path. |
Ride the Leviathan
Hold (Y) to summon a leviathan and ride him through your enemies. | |
| Hog Wild Fryno (Series 2) | 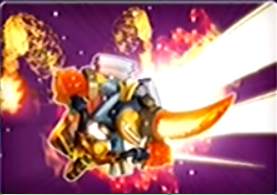
|
Burning Rubber!
While riding the motorcycle, hold Attack 2 to go into a power drift, blasting enemies with molten rocks. |
Burning Rubber!
While riding the motorcycle, press (X) to go into a power drift, blasting enemies with molten rocks. | |
| Sure Shot Shroomboom (Series 2) | 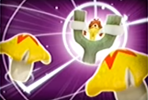
|
High Spore!
Hold Attack 1 to create mushroom bumpers and play pinball with enemies. |
Shroom Bounce
Hold (Y) to stick a giant Slingshot in the ground and use Shroomboom as munition. If (Y) is released when it's fully charged, Shroomboom will bounce on all the nearby baddies. If it's released too soon, he won't. | |
| Full Blast Jet-Vac (Series 3) | 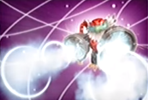
|
Double Barrel!
While flying, swap the Vac Blaster for two superpowered guns and hold Attack 1 to fire continuously until they overheat. |
Double Vac-Blasters!
Hold (A) and any direction to shoot from two different Vac-Blasters whilie sprinting. After a while, your blasters get really hot. When it happens, release (A) and quickly press (Y) to smash the ground and damage surrounding enemies. | |
See also
Trivia
- When placing a Series 3 or Series 4 Skylanders into previous games, they will have their older Wow Pows available instead of their current ones. Placing them back to their respective current game will revert them back to their default Wow Pow.
- While LightCore Skylanders and Eon's Elites are revised characters from their original, they do not possess Wow Pows and should not be confused with the Series revisions.
- In Skylanders Giants, Eon's Elites will appear as "Series 2 Special" and thus will have access to their Wow Pow if available as well as being able to change paths. However, the Wow Pow won't get carried over to later games however.
- Some Wow Pows are slightly altered for the 3DS version due to different movesets compared to consoles.
- Interestingly, on the 3DS version of Giants, Wow Pows aren't listed in the upgrades for any of the Series 2 Skylanders, but the Wow Pows does exist in-game. In later games however, descriptions were added.
- On the 3DS version of Swap Force and Trap Team, some Wow Pows are locked from preview and thus requires said figure to unlock, while the majority of Skylanders with Wow Pows can be previewed right away, regardless of whether the player owns the figures or not.
- Although Dark Spyro has different moveset compared to regular Spyro for the 3DS, their Series 3 Wow Pow are both the same.
[Edit] Games
| ||
|---|---|---|
| Main series | Spyro's Adventure • Giants • Swap Force • Trap Team • SuperChargers (Racing) • Imaginators | |
| Spin-offs | Universe • Cloud Patrol • Lost Islands • Battlegrounds • Battlecast • Ring of Heroes | |
| Miscellaneous | Skylanders Collection Vault - Skylanders Creator | |
